Showing posts with label Cricut. Show all posts
Hi Everyone!
Today I am sharing a project for Pink and Main stamps and dies.

(This blog post contains affiliate links. Compensated affiliate links used when possible at no extra cost to you. I just receive a small portion of the sales through your purchase. So Thank You!!)

Summer time is definitely a time for several occasions, Graduations, Family Reunions, Weddings, Vacations, etc. So for my card today, I made a bridal shower card to help inspire for all the weddings coming up. I used the Congrats Die on this one.

First, I dry embossed the white glitter cardstock with the Next Level embossing folder in Heart, then layered the purple dotted paper and die cut the heart window. I also die cut the heart window out of a white top folding card base. Then, I added some sparkly white tulle to the heart window and surrounded that with score tape, to act as a window for the shaker elements. Next, I added some iridescent, silver, clear, and purple sequins mixed to the tulle window and sealed it. I added the panel to the card base. Then I added the "Congrats" that I die cut twice in Silver glitter and white across the heart window. Then I popped up the bra and panties that I cut out with the Cricut from the Forever Young cartridge in black and purple. Finally, I added some Sparkle pen and a rhinestone to the bra.


Close up of the sparkly tulle window on the card.


Thank you so much for stopping by!
Make sure to join the current
Pink and Main Challenge: Red, White and Blue.
I hope you have a wonderful day!! 

Other Supplies Used:
Paper- Silver Glitter cardstock (American Crafts), White glitter cardstock (Bazzill), Purple dots pattern paper (The Paper studio), 80# White cardstock (Neenah), Purple and black cardstock (Recollections)
Die- Classic Hearts die (Spellbinders), Forever Young cartridge (Cricut)
Other- White glitter tulle (Target), Crystal Clear sparkle pen (Spectrum Noir), Next Level Dotted embossing folder (WRMK), Sequins, Rhinestones

Hi Everyone! 
I'm back to share two more cards I made for the Scrapbook.com card sketch challenge.
Here is Sketch #3.

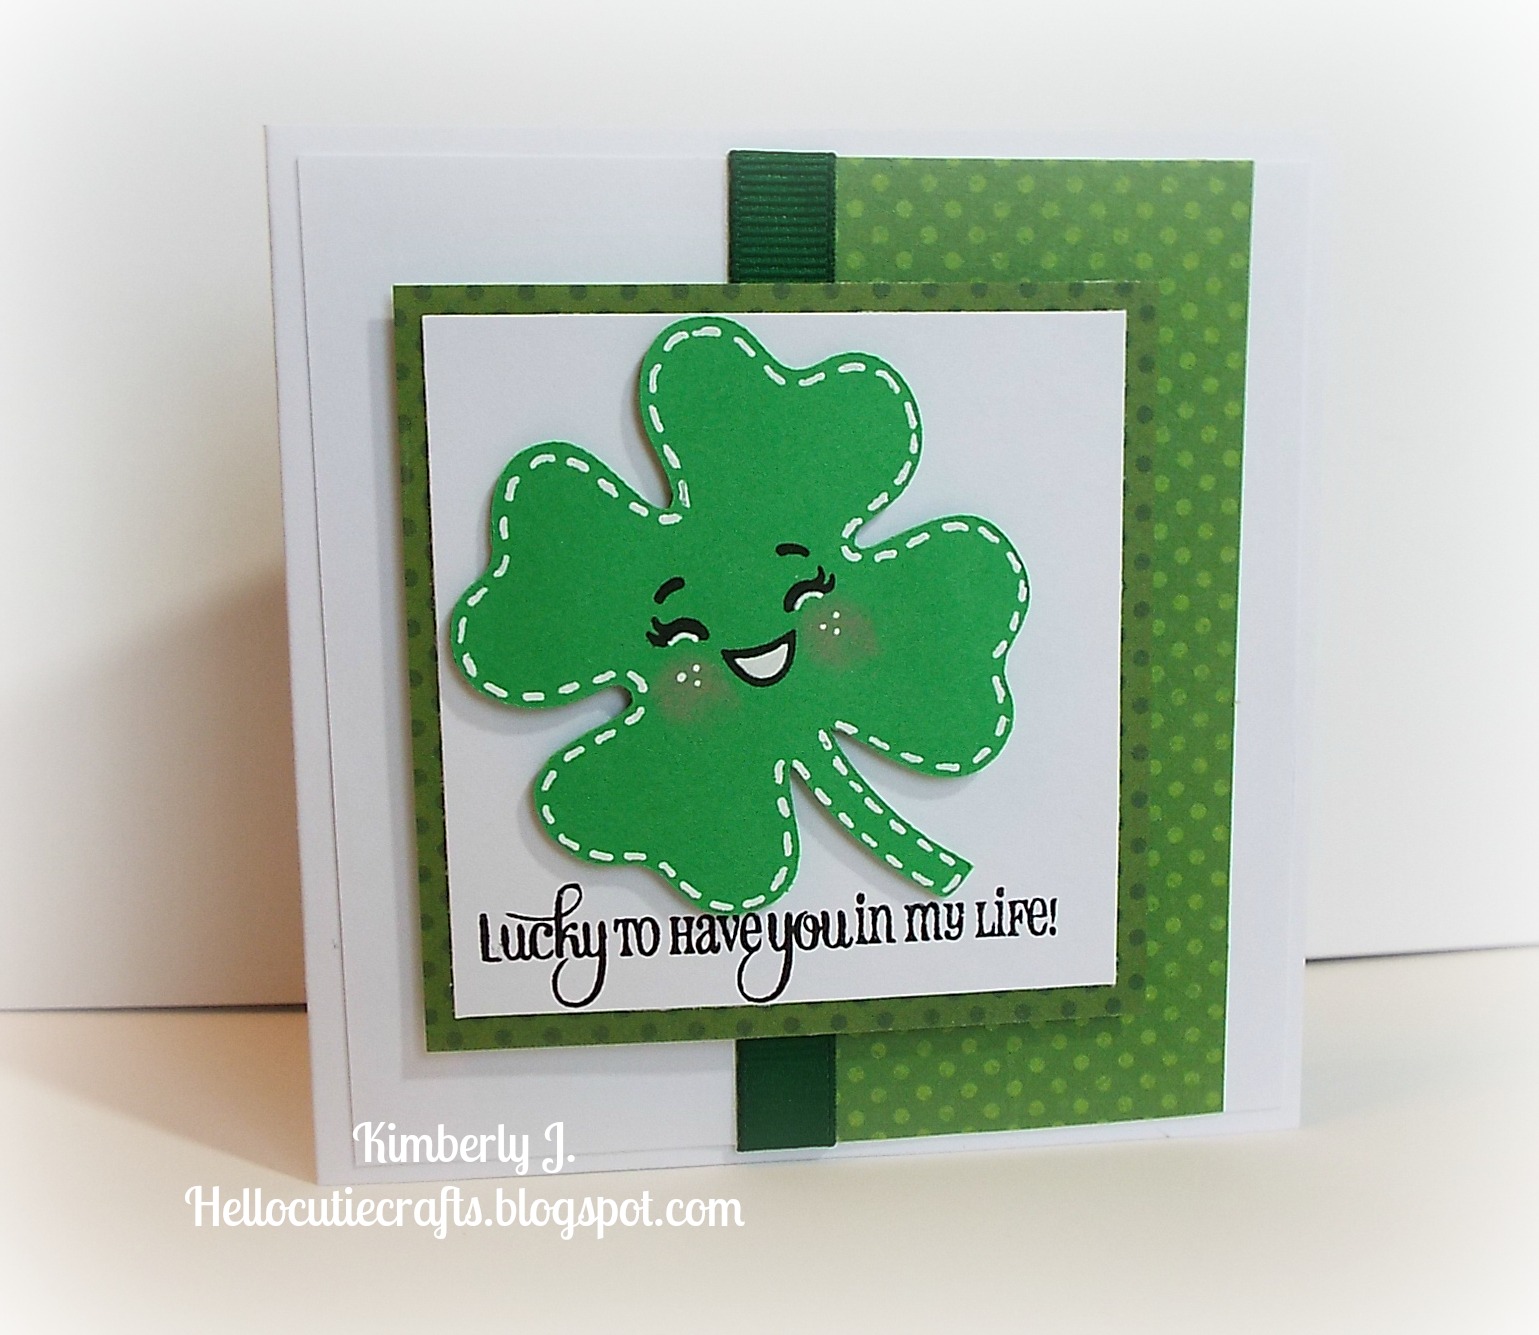
Here is my card.

I dusted off my cricut for this cute shamrock and of course, I had to add a cute Peachy face to it! 
I used my favorite PK set- Kawaii face assortment (No longer available). The sentiment is This & That from My Creative Time stamps, stamped in black Versafine ink and heat embossed in clear powder. I used the Double dots Bold and Brights 6x6 paper in two shades of green. I added a stripe of green ribbon to the card panel. Then I added some white faux stitching to the shamrock and accents to the face and used some Pink chalk on the cheeks. The card size is 4.25 x 4.25.

Products used:
Designer Calendar cartridge- Shamrock (Cricut)
Kawaii Face asst. (PKS)
This and That stamp set (My Creative Time)
Onyx Black ink (Versafine)
Clear embossing powder (Zing!)
Double Dots Bold and Brights 6x6 (BoBunny)
Ribbon (Michaels)
Green card stock (Recollections)
Stampin Pastels (SU)

Here is card sketch #5.

Here is my card.

For this card, I used one of the new March digital images from 2 Cute Ink digital stamps called Easter Friends.  I colored the image with copic markers and die cut the image with circle dies. Then I cut a scalloped circle with the Birthday Bash cartridge on my Cricut using the Springtime 6x6 paper pad from Doodlebug designs. Next I heated embossed the sentiment using white ink and embossing powder, the sentiment is from My Kind of Peep stamp set from Simon Says Stamp March 2016 card kit. The background is embossed with swiss dots embossing folder. I added some white gel pen accents and white ruffled ribbon.

Products Used:
Easter Friends (2CuteInk)
Copic markers
Birthday Bash cartridge (Cricut)
My Kind of Peep stamp set (SSS March card Kit)
White embossing powder (SU)
Unicorn ink (Hero Arts)
White gel pen (Sakura and Uniball)
Springtime 6x6 paper (Doodlebug)
Swiss Dots embossing folder (Cuttlebug)
Double dots-Green paper (BoBunny)
Wink of stella clear glitter brush pen

Thank You so much for stopping by!! 
Have wonderful day!
I made this banner with my gypsy and my cricut. I used cereal boxes to cut as chipboard to reinforce everything. Our kids just love it! :)

Photobucket

Photobucket

Photobucket
Photobucket

Enjoy! I hope everyone is having a Great Saturday!
Last night, I decided that I wanted to decorate my cricut with some Hello Kitty vinyl. I love how it turned out! So I did my name too! I just thought I would share. Thanks for looking!


Photobucket